.gif)


-
 Getting started
- File management
- Viewing Data
- Labelling Data
Connecting to hardware
Before you can get to know the features of the PowerLine software, you will need some data to play with. Assuming that you have captured some data on a logger, the following steps describe how you can setup the connections between the PC and the logger and download the data.
- Place the logger in the download cradle and connect it to the PC using the USB cable.
- Turn the logger on - the PC will recognise that a logger has been connected. The first time that this has been performed on a PC, it may take a few moments for the PC to activate the software drivers for the USB port.
- From the PowerLine software, select Tools→Options.
- On the Communications tab, select the USB Serial Port in the Download field that corresponds to the logger. This will have a green tick against it.
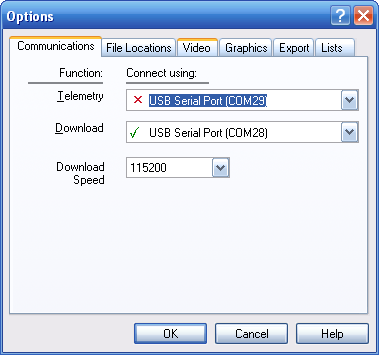
If you have several USB serial devices currently connected to the PC, then you will need to know which is which. By disconnecting the logger's USB cable, the green tick will turn into a red cross. - On the File Locations tab, select the folder where you want downloaded data to be stored.
- Press OK to close the Tools→Options dialog box.
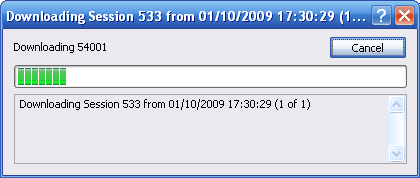
- Select Tools→Download data (also CTRL-F12 as a hotkey).
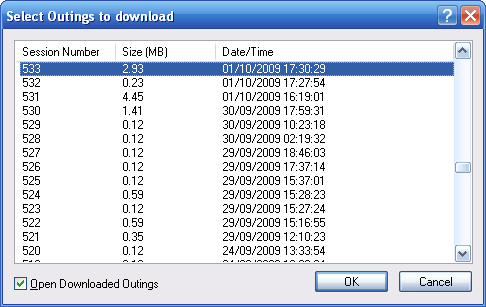
- Select one or more sessions and press OK.

A dialog will pop up showing the sessions available for download on the logger.
The data will now be downloaded from the logger to the PC.